1. Supported AI Providers
Neo AI supports 7 AI providers. You only need one to get started. Each offers different pricing, speed, and privacy trade-offs.
| Provider | Badge | Description | Website |
|---|---|---|---|
| OpenAI | RECOMMENDED | Industry standard for high-accuracy institutional reporting | openai.com |
| Anthropic | RECOMMENDED | Claude models optimized for safety and long-form document context | anthropic.com |
| Groq | FAST & AFFORDABLE | Ultra-fast LPU inference for real-time collaborative drafting | groq.com |
| Gemini | RECOMMENDED | Google's multimodal models built for speed and scalable reasoning | ai.google.dev |
| OpenRouter | MULTI-MODEL | Unified API gateway to 200+ models from every major provider | openrouter.ai |
| DeepSeek | AFFORDABLE | Cost-efficient reasoning models with competitive benchmark scores | deepseek.com |
| Local LLM | SELF-HOSTED | Connect to LM Studio or Ollama for air-gapped data privacy | See Local LLM section |
Tip for beginners: Start with Groq — generous free tier, fast inference, and the easiest to set up.
2. API Key Safety
⚠️ Important: When you switch between AI providers in the app, the API key field is cleared. This is by design — each provider uses a different key format and endpoint.
Before switching providers, always save your current API key in a secure text file. You will need to re-enter it if you switch back.
Best Practices
- Store keys in a password manager (1Password, Bitwarden, etc.)
- Never commit API keys to version control
- Never share your keys publicly
- Rotate keys periodically from the provider's dashboard
Getting Your API Key
All cloud providers follow the same basic flow:
- Create an account on the provider's website
- Navigate to API Keys (usually under Settings, Developers, or Account)
- Generate a new API key — copy it immediately (you won't see it again)
- Add credits/billing if required (most providers offer free tiers)
- Paste the key into the AI Settings page in this app
- Save your key in a secure text file before leaving the page
Security Note: Your API key is stored encrypted in your database. Never share it publicly or commit it to version control.
3. Provider Setup Instructions
3.1 OpenAI
- Sign up at platform.openai.com
- Go to API Keys → Create new secret key
- Copy the key (starts with
sk-...) - In the app Settings → AI Provider:
- Provider: OpenAI
- API Key: Paste your key
- Base URL:
https://api.openai.com/v1(default) - Model:
gpt-4o(recommended) orgpt-4o-mini
Example models: gpt-4o gpt-4o-mini gpt-4-turbo gpt-3.5-turbo
3.2 Anthropic
- Sign up at console.anthropic.com
- Go to API Keys → Create Key
- Copy the key (starts with
sk-ant-...) - In the app Settings → AI Provider:
- Provider: Anthropic
- API Key: Paste your key
- Base URL:
https://api.anthropic.com(default) - Model:
claude-3-5-sonnet-20241022(recommended)
Example models: claude-3-5-sonnet-20241022 claude-3-5-haiku-20241022 claude-3-opus-20240229
3.3 Groq
- Sign up at console.groq.com
- Go to API Keys → Create API Key
- Copy the key (starts with
gsk_...) - In the app Settings → AI Provider:
- Provider: Groq
- API Key: Paste your key
- Base URL:
https://api.groq.com/openai/v1(default) - Model:
llama-3.3-70b-versatile(recommended)
Example models: llama-3.3-70b-versatile deepseek-r1-distill-llama-70b llama-guard-3-8b
3.4 Gemini (Google)
- Sign up at aistudio.google.com
- Go to Get API Key → Create API Key
- Copy the key
- In the app Settings → AI Provider:
- Provider: Gemini
- API Key: Paste your key
- Base URL:
https://generativelanguage.googleapis.com/v1beta/openai/(default) - Model:
gemini-2.0-flash(recommended)
Example models: gemini-2.0-flash gemini-1.5-pro gemini-1.5-flash
3.5 OpenRouter
- Sign up at openrouter.ai
- Go to Keys → Create Key
- Copy the key (starts with
sk-or-...) - In the app Settings → AI Provider:
- Provider: OpenRouter
- API Key: Paste your key
- Base URL:
https://openrouter.ai/api/v1(default) - Model:
openai/gpt-4oor any supported model
Example models: openai/gpt-4o openai/gpt-oss-120b anthropic/claude-3.5-sonnet google/gemini-2.0-flash
OpenRouter gives you access to 200+ models through a single API. Browse available models at openrouter.ai/models.
3.6 DeepSeek
- Sign up at platform.deepseek.com
- Go to API Keys → Create API Key
- Copy the key (starts with
sk-...) - In the app Settings → AI Provider:
- Provider: DeepSeek
- API Key: Paste your key
- Base URL:
https://api.deepseek.com/v1(default) - Model:
deepseek-chat(recommended)
Example models: deepseek-chat deepseek-reasoner
4. Local LLM Setup (LM Studio & Ollama)
For air-gapped environments or complete data privacy, you can run LLMs locally on your machine. Neo AI supports two popular local LLM servers.
4.1 Option 1: LM Studio
LM Studio is a desktop app that lets you download and run LLMs locally.
Installation
- Download from lmstudio.ai
- Install and launch LM Studio
- Download a model (e.g., Llama 3, Mistral, Phi-3) from the built-in model library
Start the Local Server
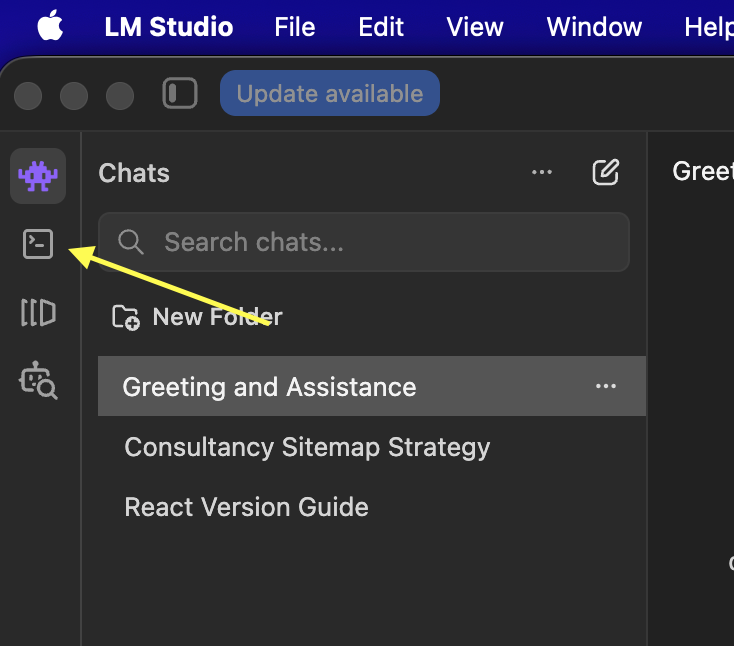
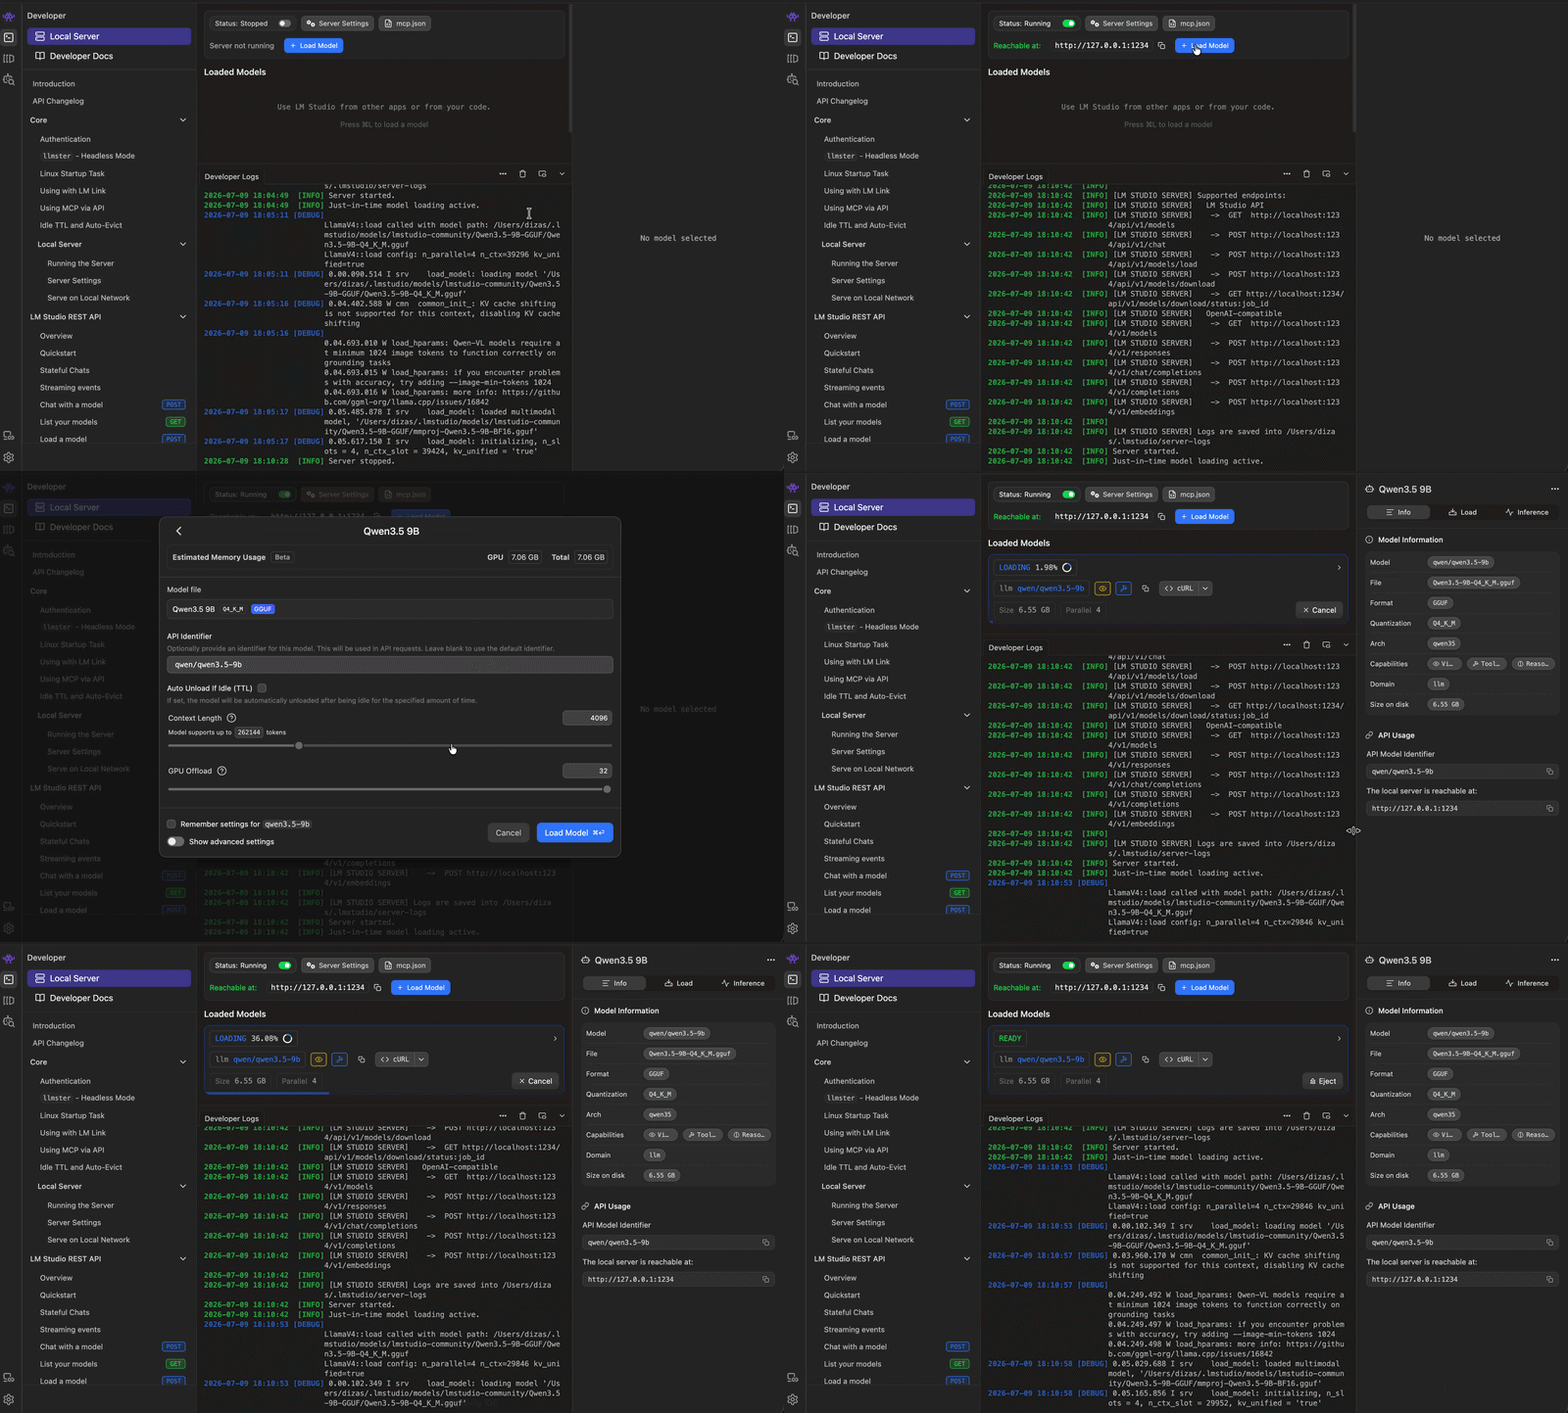
- In LM Studio, go to the Local Server tab (left sidebar)
- Select your downloaded model
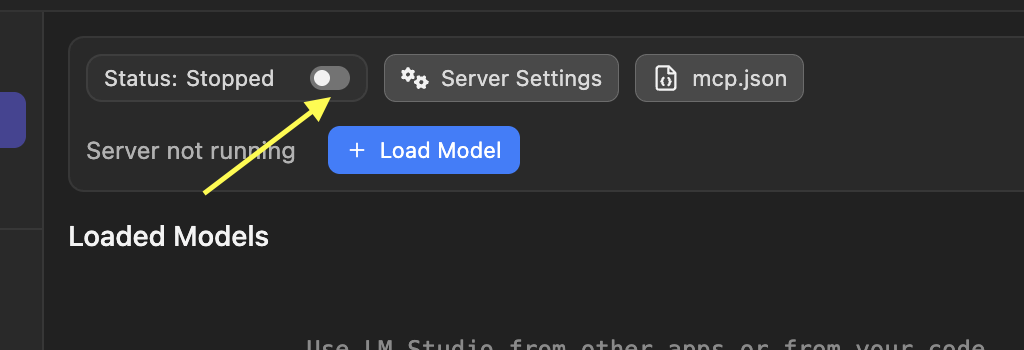
- Click Start Server
- The server will run at
http://localhost:1234by default
Configure the App
In the app Settings → AI Provider:
- Provider: Local LLM
- API Key: Leave blank (local servers don't require auth)
- Base URL:
http://localhost:1234/v1 - Model: Enter the exact model name shown in LM Studio (e.g.,
llama-3.2-3b-instruct)
Important: The app must be able to reachlocalhost:1234. If you're running the app in Docker, usehost.docker.internalinstead oflocalhost.
4.2 Option 2: Ollama
Ollama is a command-line tool for running LLMs locally.
Installation
macOS / Linux:
curl -fsSL https://ollama.com/install.sh | shWindows: Download from ollama.com and run the installer.
Pull and Run a Model
# Pull a model (e.g., Llama 3.2)
ollama pull llama3.2

# Run the model (starts server on port 11434)
ollama serve
Or run in background:
ollama serve &Configure the App
In the app Settings → AI Provider:
- Provider: Local LLM
- API Key: Leave blank
- Base URL:
http://localhost:11434/v1 - Model:
llama3.2(or whatever model you pulled)
Note: Ollama's OpenAI-compatible endpoint is at/v1, so the full URL ishttp://localhost:11434/v1.
4.3 Local LLM Requirements
| Requirement | Minimum | Recommended |
|---|---|---|
| RAM | 8 GB | 16 GB+ |
| VRAM (GPU) | 4 GB | 8 GB+ |
| Disk Space | 5 GB | 20 GB+ |
| OS | macOS 12+, Ubuntu 20.04+, Windows 10+ | Latest stable |
4.4 Recommended Models for Local Use
| Model | Size | RAM Needed | Best For |
|---|---|---|---|
| Llama 3.2 (3B) | ~2 GB | 6 GB | Fast, lightweight tasks |
| Llama 3.2 (11B) | ~7 GB | 12 GB | Balanced quality/speed |
| Mistral (7B) | ~4 GB | 8 GB | General purpose |
| Phi-3 Mini (3.8B) | ~2 GB | 6 GB | Compact, capable |
| Gemma 2 (9B) | ~5 GB | 10 GB | Google's open model |
5. Troubleshooting
"Connection failed" or "Cannot reach server"
- Ensure the local LLM server is running (
localhost:1234for LM Studio,localhost:11434for Ollama) - Check firewall settings
- If using Docker, use
host.docker.internalinstead oflocalhost
"Model not found"
- Verify the model name matches exactly (case-sensitive)
- In LM Studio: check the model name in the Local Server tab
- In Ollama: run
ollama listto see installed models
Slow generation speed
- Use a smaller model (3B-7B parameters)
- Ensure you have enough RAM/VRAM
- Close other GPU-intensive applications
- For LM Studio: enable GPU acceleration in settings
API key errors
- Double-check the key is copied correctly (no extra spaces)
- Verify the key hasn't expired or been revoked
- Ensure billing is set up (for cloud providers)
- Check the provider's status page for outages
Need help? Check the other guides in the docs/ folder or contact support. 🚀